
Jan 26, 2026

Pawel Gola
Framer & Webflow Expert
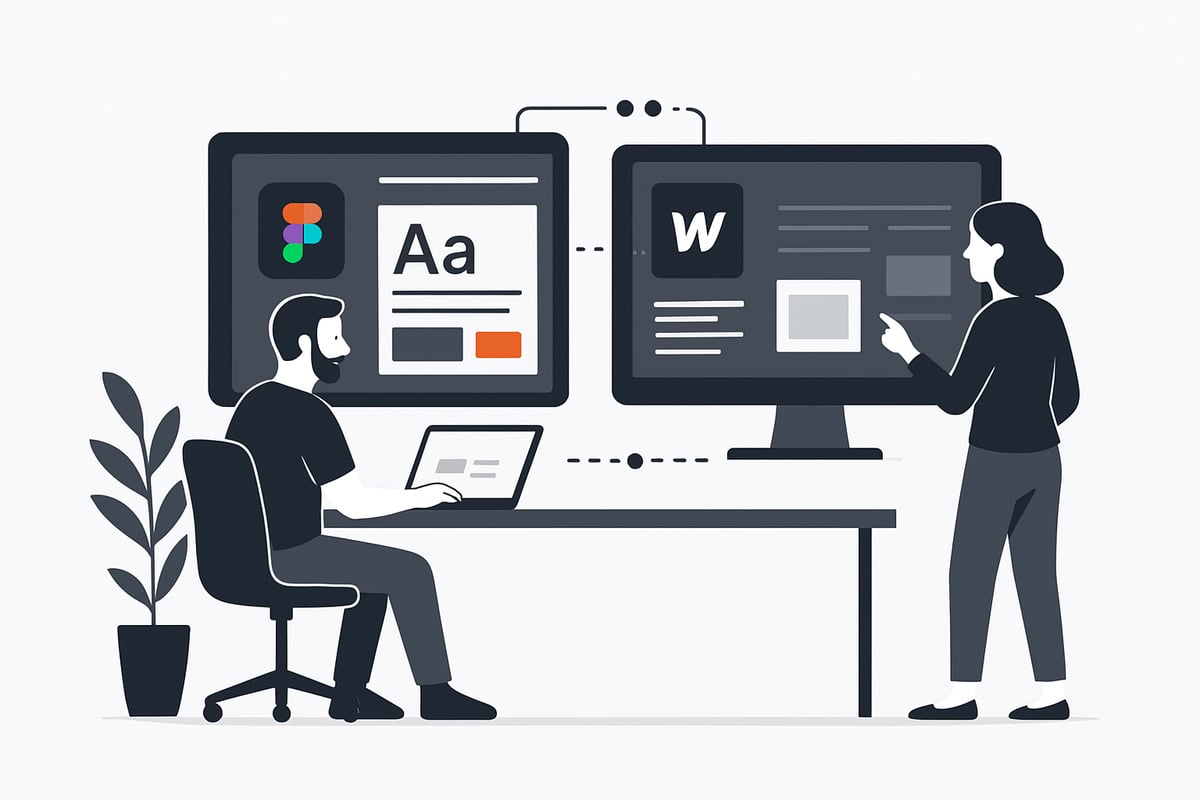
Digital teams in 2026 face mounting pressure to deliver websites quickly while maintaining flawless design fidelity. Manual handoff processes often slow down launches and risk losing critical visual details.
Fortunately, new figma to webflow integrations bridge the gap between design and development. This guide will show you how to transform Figma designs into live, production-ready Webflow sites with step-by-step instructions, best practices, and troubleshooting tips.
By following this process, you will master a workflow that enables pixel-perfect, responsive sites without the need for code or tedious rework.
Understanding the Figma to Webflow Ecosystem in 2026
The figma to webflow ecosystem has rapidly matured by 2026, transforming how digital teams move from design to live websites. Figma stands as the leading collaborative design platform, prized for its real-time editing and robust design system capabilities. Webflow, on the other hand, empowers creators to build production-ready websites visually, without writing code.
From Static Handoffs to Real-Time Sync
Historically, the figma to webflow journey involved exporting static design assets, then manually rebuilding layouts in Webflow. This approach often led to bottlenecks, miscommunication, and lost design fidelity. In 2026, the workflow has evolved into a dynamic, real-time sync powered by advanced integrations.
The Figma to Webflow plugin first enabled designers to import layouts, styles, and assets directly. By 2024, the introduction of the Figma to Webflow App marked a significant leap. Unlike the plugin, which focuses on one-time imports, the App supports ongoing, real-time synchronization of components and design systems between Figma and Webflow. For more details on this advancement, review the Figma to Webflow App Release.
Supported Design Elements and Continuous Innovation
Modern figma to webflow integrations support a broad spectrum of design properties. Teams can now sync:
Typography, font weights, and variable fonts
Auto layout structures and responsive stacking
Color variables, gradients, and style guides
Vectors, SVG graphics, and images
Custom grids, spacing, and breakpoints
Webflow Labs plays a pivotal role in advancing these features. Through regular updates and community feedback, the integration now supports over 50 CSS declarations and more than 20 prebuilt layouts. This ensures design fidelity and reduces the need for manual adjustments after import.
Comparing Old and New Workflows
Traditional handoff tools like Zeplin or Avocode required developers to interpret static specs and recreate them in code. This process was slow and prone to errors. The figma to webflow ecosystem, by contrast, enables live sync between design and development, drastically reducing manual recreation.
Feature | Traditional Handoff (Zeplin/Avocode) | Figma to Webflow Plugin/App |
|---|---|---|
Live Sync | No | Yes |
Auto Layout Mapping | Limited | Full Support |
Responsive Controls | No | Yes |
Design System Sync | Manual | Automated |
Supported CSS Properties | ~20 | 50+ |
Real-World Impact: Agencies and Teams
Over 17,000 creators now rely on figma to webflow workflows for efficient site launches. Agencies have reported project delivery times cut by up to 40 percent, as designers and developers collaborate in parallel. By reducing manual recreation and ensuring pixel-perfect fidelity, teams can focus on creative problem-solving rather than tedious handoff tasks.
The figma to webflow ecosystem in 2026 sets a new standard for seamless, collaborative, and scalable website creation.
Setting Up the Figma to Webflow Plugin and App: Step-by-Step
Launching a seamless figma to webflow workflow begins with a smooth setup. Whether you are working solo or with a large digital team, configuring the plugin and app lays the foundation for efficient, real-time design-to-site collaboration.
Prerequisites
Before you start, confirm you have:
Active Figma and Webflow accounts
Appropriate workspace permissions for both platforms
A supported browser like Chrome or Firefox
This ensures the figma to webflow process runs without interruptions.
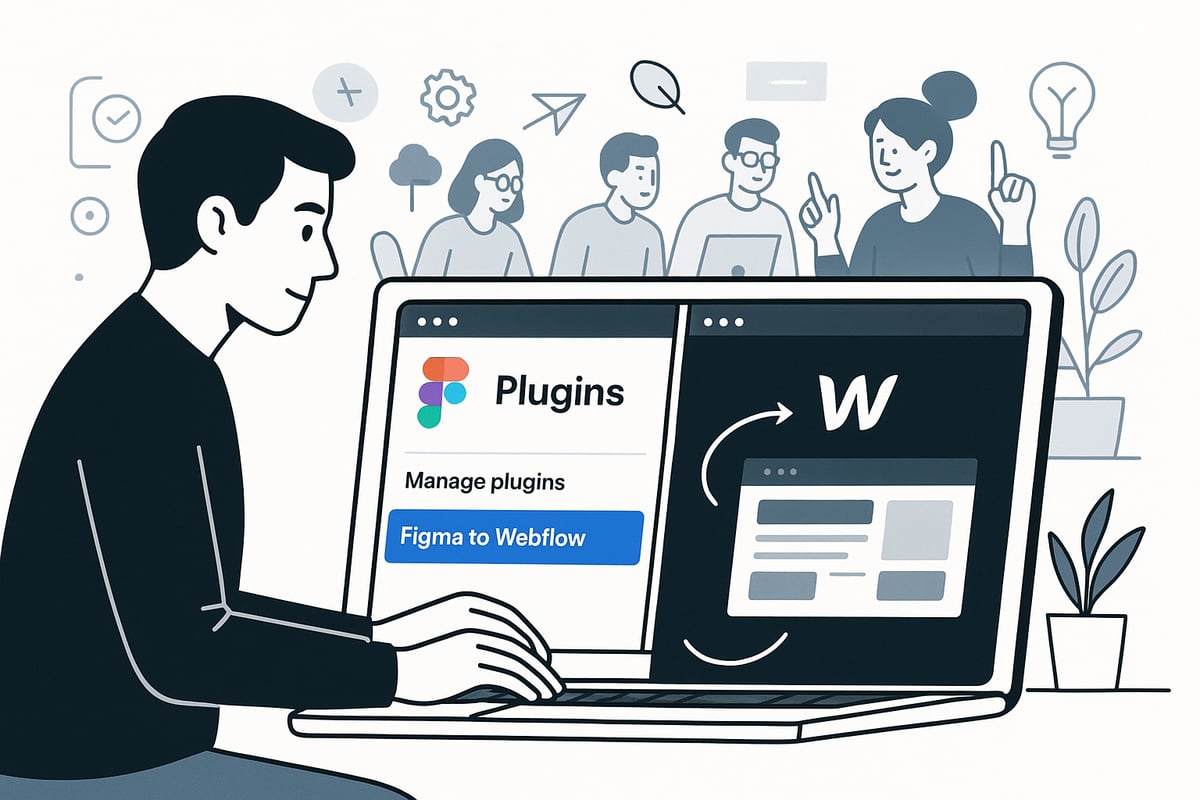
Step 1: Install the Figma to Webflow Plugin
Begin by installing the Figma to Webflow plugin from the Figma Community. Navigate to the Figma Community, search for the plugin, and click "Install." This plugin enables direct connection between your Figma files and Webflow projects.
For detailed installation steps and troubleshooting, refer to the Figma to Webflow Plugin Guide.
Step 2: Authorize Webflow Sites or Workspaces
After installation, open the plugin within your Figma file. You will be prompted to authorize access to your Webflow account and select the intended site or workspace. This step is crucial for secure figma to webflow integration.
Ensure you have admin or editor permissions in your Webflow workspace to enable full sync capabilities.
Step 3: Connect Figma to Webflow
With authorization complete, run the plugin in your Figma file. Log in to your Webflow account through the plugin interface. Once connected, you can choose the Webflow project that will receive your Figma designs.
This connection allows for the transfer of components, variables, and design systems, streamlining the figma to webflow workflow.
Step 4: Install and Launch the Figma to Webflow App
In 2026, Webflow introduced a dedicated Figma to Webflow App within the Webflow Designer. Access the Designer, open the App Marketplace, and add the Figma to Webflow App to your workspace.
This app offers advanced features for ongoing sync, surpassing the capabilities of the traditional plugin.
Step 5: Authenticate Connection for Real-Time Sync
Once the app is installed, authenticate the connection between your Figma and Webflow accounts. Follow the prompts in the Webflow Designer to link your Figma files. This step enables real-time updates, ensuring any changes in Figma are reflected in Webflow almost instantly.
Authentication is a key part of a frictionless figma to webflow experience.
Step 6: Select Projects for Synchronization
Choose the specific Figma file and Webflow project you want to sync. Double-check you have selected the correct versions to avoid overwriting live work.
Set up mapping for components, variables, and design system elements. This organization is critical for maintaining design fidelity throughout the figma to webflow pipeline.
Step 7: Initial Sync and Import
Initiate the first sync. The plugin or app will import Figma components, variables, typography, images, and responsive layouts into Webflow. Review the imported elements in the Webflow Designer to verify accuracy.
The figma to webflow integration supports over 20 prebuilt layouts and more than 50 CSS properties, ensuring your designs translate with minimal manual adjustments.
Example: SaaS Startup Syncing a Design System
Consider a SaaS startup that needs to launch multiple product pages rapidly. By setting up figma to webflow sync, the team imports a complex design system and reusable components in just minutes. This eliminates repetitive handoff tasks and accelerates the path from prototype to production.
Key Insight: Plugin vs App
Understanding the distinction between the plugin and app is essential for optimal workflow:
Feature | Figma to Webflow Plugin | Figma to Webflow App |
|---|---|---|
Sync Type | One-time import | Ongoing, real-time |
Best For | Initial setup, small changes | Continuous updates, large projects |
Supported Elements | 20+ layouts, 50+ CSS props | Expanded, with live sync |
Choose the approach that matches your team's figma to webflow needs.
Data and Recap
With the latest integration tools, setting up figma to webflow is faster and more reliable than ever. The process now supports a wide range of design elements, real-time updates, and robust permissions, letting you focus on building great web experiences.
Best Practices for Figma-to-Webflow Design Sync
Achieving a smooth figma to webflow workflow requires careful planning and attention to detail from the very start. By following proven best practices, you can ensure your designs are accurately and efficiently translated from Figma to live Webflow sites. Let us break down the essential steps and strategies every team should use.
Structuring Figma Files for Webflow Success
The foundation of any effective figma to webflow process is a well-structured Figma file. Start by organizing your design into logical pages, frames, and sections. Use auto layout for all major containers, grids, and repeatable elements to ensure flexibility when your design is imported into Webflow.
Establish clear naming conventions for layers, groups, and components. This not only helps with file management but directly influences how classes and elements are generated in Webflow. Avoid unnecessary grouping and excessive nesting, as these can complicate the conversion process and result in messy code.
If you are looking for inspiration or want to kick off your figma to webflow workflow with a solid foundation, explore curated Figma templates for web projects. Well-structured templates can save time and help enforce best practices from the beginning.
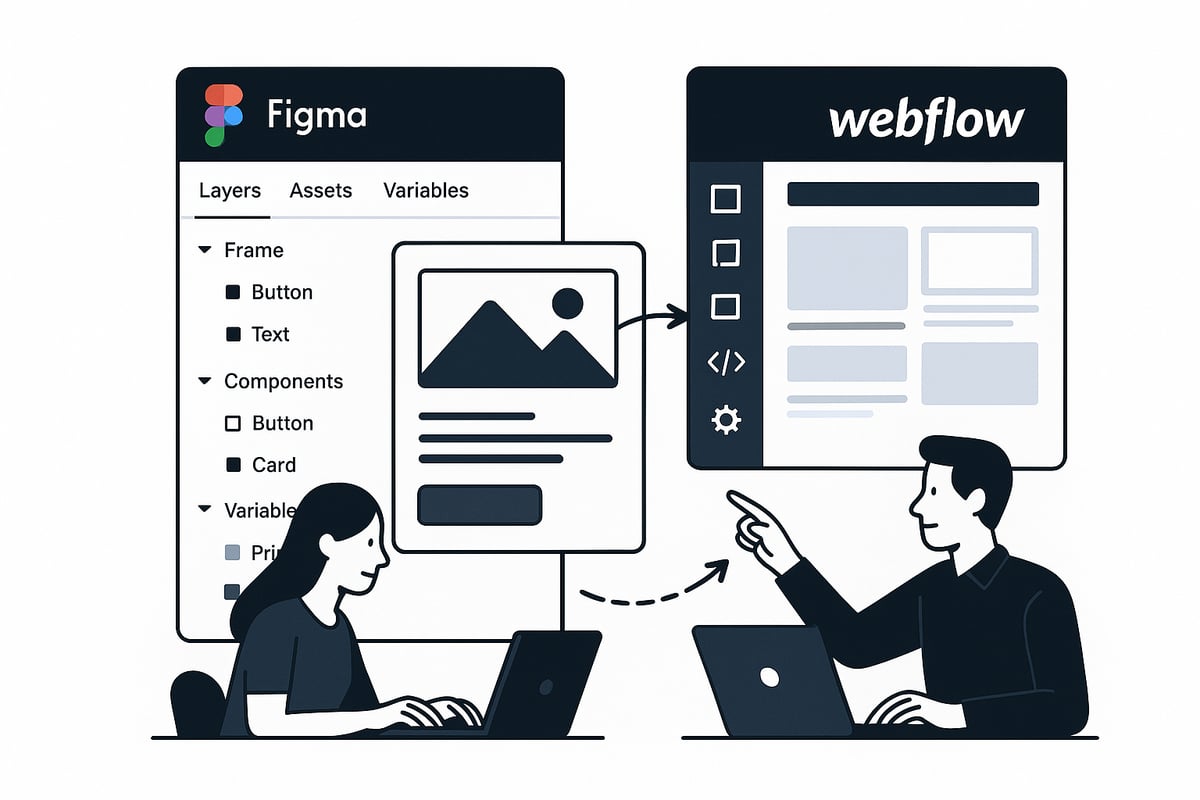
Component Mapping and Naming Strategies
Components are at the heart of modern design systems and are crucial for a successful figma to webflow sync. Create reusable components in Figma for all UI elements that will repeat across your site, such as buttons, navigation bars, and cards.
When naming components, use descriptive, consistent terms that will translate clearly into Webflow classes. For example, use Button/Primary or Card/Product rather than generic names. This clarity will ensure that your codebase remains organized and maintainable after import.
Name image assets, SVGs, and vectors with purpose. Avoid default names like Rectangle 1 or Image 2. Instead, use names like Hero-Background or Logo-Icon. This attention to detail makes updates easier and improves asset management throughout your figma to webflow workflow.
Leveraging Variables and Responsive Design
Figma variables play a critical role in ensuring design consistency during figma to webflow conversion. Define variables for colors, typography, and spacing tokens within your Figma file. This approach guarantees that your design system translates accurately and remains easy to update after syncing.
Use auto layout and Figma’s responsive resizing tools to define how elements should behave at different breakpoints. This setup allows Webflow to interpret your intentions, making the responsive design process much smoother. Avoid arbitrary grouping, as it can create extra divs and complicate the responsive stack in Webflow.
Check that your layers and containers are logically structured, which enables breakpoint controls and stacking behaviors to function as expected. Responsive support is a core advantage of the figma to webflow workflow, so leverage these features to the fullest.
Real-World Example: Agency Workflow & Key Insights
Consider an agency managing multiple client projects with the figma to webflow workflow. By maintaining organized Figma files—using clear component hierarchies, consistent variables, and precise naming—they cut down manual rework and speed up delivery timelines.
A typical process might involve designers building out the full design system in Figma first, then syncing core components and layouts directly into Webflow. All edits to synced components are made in Figma, not Webflow, to prevent sync breaks and maintain a single source of truth.
Responsive design is tested in both Figma and Webflow, ensuring that stacking behaviors and breakpoints are preserved. This approach enables teams to collaborate efficiently and maintain pixel-perfect design fidelity throughout the figma to webflow pipeline.
Advanced Features, Limitations, and Troubleshooting
Modern workflows for figma to webflow conversion are packed with advanced capabilities that elevate both design fidelity and developer efficiency. Understanding the full scope of what is possible, and where boundaries exist, helps teams deliver seamless, production-ready sites faster than ever.
Supported Advanced Features in Figma to Webflow
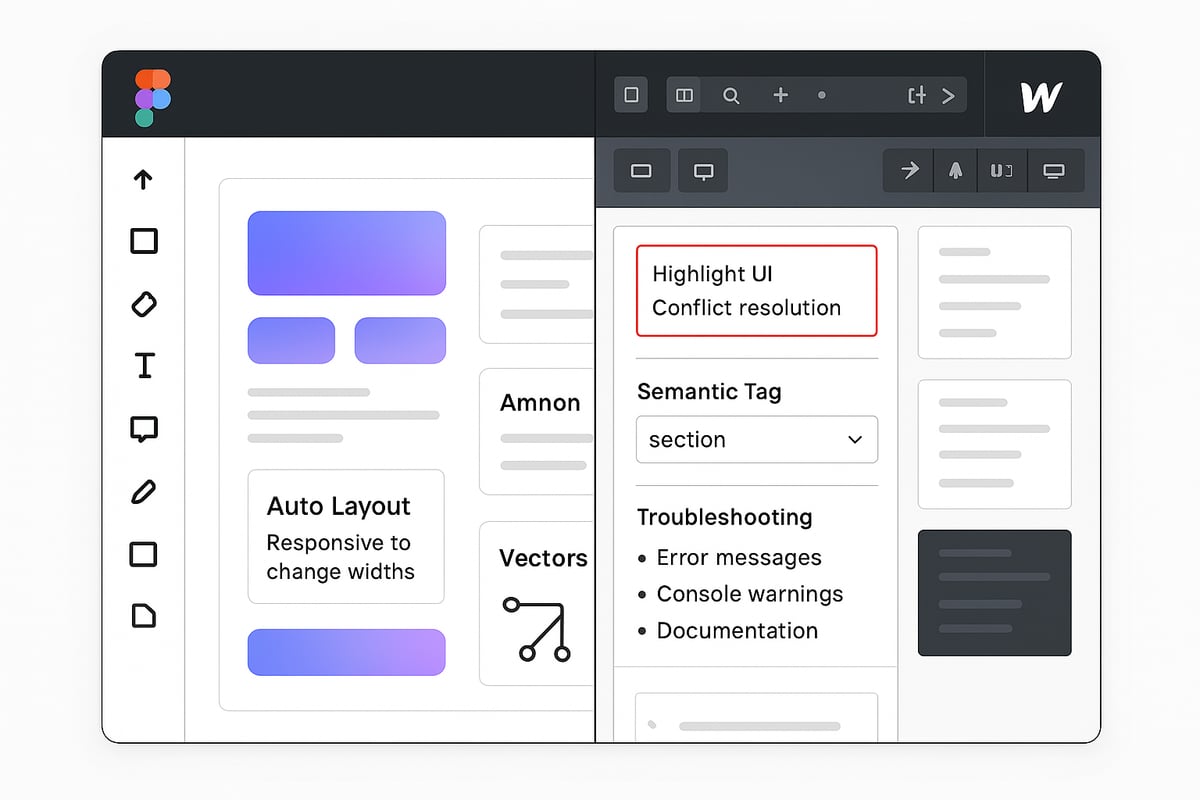
The latest figma to webflow integration supports a wide array of design elements, giving creators more control and precision. Users can seamlessly transfer gradients, custom vectors, SVG exports, and intricate style guides directly from Figma into their Webflow projects.
Semantic HTML is a core benefit. Designers can define custom tags like section, header, or footer within Figma, ensuring the resulting site is both accessible and SEO optimized after sync. Style guides and variables also migrate, preserving branding and design consistency.
Recent updates have further expanded the capabilities of figma to webflow workflows. For a comprehensive look at these enhancements and how they improve accuracy, see the Figma to Webflow Integration Improvements page.
Recognizing Key Limitations
Despite the robust feature set, figma to webflow integration has some limitations. Interactive elements such as animations, transitions, and complex interactions still need to be built natively within Webflow. Not all Figma effects (like advanced blurs or blend modes) are fully supported in the sync process.
Designers should also be aware that certain layer effects and custom plugins in Figma may not render identically in Webflow. It is important to test and adjust these elements post-sync to ensure visual consistency.
Handling Sync Conflicts and Resolution Strategies
Syncing between figma to webflow is designed for reliability, but conflicts can occur. For example, if a component is deleted in Figma after syncing, Webflow will flag this change. Teams have three main options:
Remove the missing element in Webflow.
Import the component as unsynced, preserving the design but breaking the sync.
Revert the change in Figma, restoring the component for continued syncing.
A real-world scenario: An agency working on a multi-page site accidentally deletes a navigation component in Figma. During the next sync, the Webflow app alerts the team, allowing them to choose whether to restore the component or proceed without it. This flexibility helps maintain project momentum.
Resetting the Plugin or App and Tapping Community Resources
Occasionally, issues with the figma to webflow connection may require a reset. Removing and reinstalling the plugin or app can resolve stubborn sync or authorization errors. This process is straightforward: uninstall the integration from both platforms, then reinstall and reconnect your accounts.
For ongoing troubleshooting, both Webflow University and the community forums offer extensive guides and real-world tips. These resources empower users to overcome challenges, stay updated on new features, and connect with other professionals leveraging figma to webflow in their daily workflows.
Optimizing Your Webflow Site Post-Sync
After you complete your figma to webflow sync, the journey to a polished, production-ready website is just beginning. Optimization ensures your site not only looks great but also performs, ranks, and remains accessible for all users.
Enhance with Dynamic Content
One of the strongest advantages of Webflow is its powerful CMS. After the figma to webflow transfer, consider transforming static sections into dynamic collections. This allows you to easily update blogs, portfolios, or product listings without touching the visual design.
Use the CMS to populate repeating sections and connect your design to real data. This step futureproofs your site and streamlines ongoing content management for teams and clients alike.
Add Interactions and Animations
While the figma to webflow process brings over layout and style, interactive elements require manual setup. Take advantage of Webflow’s built-in animation tools to add hover effects, scroll-based reveals, and microinteractions.
These enhancements elevate user engagement and bring your static designs to life. For inspiration, explore Webflow templates and design tips to see how others optimize their imported designs.
Implement Robust SEO Practices
SEO is critical for discoverability. After using figma to webflow workflows, review all pages for semantic HTML structure. Assign proper heading tags, add descriptive meta titles and descriptions, and ensure every image includes alt text.
Webflow’s Designer makes it easy to edit these elements directly. Optimize for keywords relevant to your audience and use clean, readable URLs for each page.
Ensure Accessibility for All Users
Accessibility is not optional. During figma to webflow optimization, check that your site uses semantic tags like nav, main, and footer. Implement ARIA labels where needed and test keyboard navigation.
Accessible design broadens your reach and is increasingly required by law in many regions. Use Webflow’s audit tools to catch and resolve issues early.
Optimize Performance and Hosting
A fast site keeps visitors engaged. Compress images, enable lazy loading, and remove unused classes or styles left from the figma to webflow import. Test your site on multiple devices and browsers.
Webflow’s infrastructure provides fast global hosting with reliable uptime, ensuring your optimized site delivers a great experience everywhere.
Optimization Checklist
Enable Webflow CMS for dynamic content
Add custom interactions and animations
Assign proper heading tags and alt text
Use ARIA labels for accessibility
Compress and lazy load images
Remove unused styles and assets
Test on all major devices and browsers
Real-World Impact
Consider an agency that imported a Figma landing page using figma to webflow and then optimized it with CMS, SEO, and accessibility best practices. The result was a high-performing, accessible site that ranked well and could be updated in minutes, not days.
Continuous improvement is key. Leverage Webflow’s free lifetime updates and active community for feedback and new features. With the right figma to webflow optimization process, your site will stand out for both users and search engines.
Resources and Next Steps for Mastering Figma to Webflow
Mastering the figma to webflow process requires more than just technical know-how. It calls for continuous learning, leveraging community wisdom, and utilizing the best resources available. Whether you are a designer, developer, or agency, charting your path to expertise is easier when you know where to look.
Essential Documentation and Tutorials
Start with the official resources. Webflow University offers comprehensive guides and video tutorials on the figma to webflow workflow. These step-by-step lessons cover everything from initial setup to advanced sync features. Bookmark these tutorials for quick reference as you experiment with new projects.
Tap into Community and Support
Join the Webflow Labs Community to connect with thousands of creators who use figma to webflow daily. Forums are active with troubleshooting tips, workflow hacks, and peer reviews. When you encounter an issue, chances are someone has solved it before. Webflow Labs also collects user feedback for continuous improvement, ensuring the tools evolve based on real-world needs.
Free Tools and Resources
Take advantage of free checklists, style guides, and template libraries. These resources help streamline your figma to webflow migration, reducing setup time and avoiding common pitfalls. For design inspiration and ready-to-convert layouts, explore this curated collection of Figma website template inspiration. Templates designed with Webflow conversion in mind can accelerate your build process and support best practices.
Stay Ahead with Updates and Learning
Keep your knowledge fresh by subscribing to release notes and product updates from both Figma and Webflow. Attend webinars and download eBooks or whitepapers focused on the latest trends in figma to webflow workflows. These advanced resources dive into topics like real-time collaboration, design system management, and future-proofing your web projects.
Real-World Success Story
Consider the journey of a designer who starts with a Figma prototype and launches a fully functional Webflow site. By using the figma to webflow integration, they import components, sync updates, and refine responsive layouts in record time. This streamlined approach enables faster launches, fewer errors, and higher client satisfaction.
Shaping the Future of No-Code
The figma to webflow ecosystem is shaped by a vibrant community of over 17,000 creators. From agencies to solo freelancers, users are finding new ways to optimize their workflows and deliver better results. For a deeper look at why this migration is transforming web development, explore the Figma to Webflow Migration Benefits.
Stay curious and proactive. Experiment with new features, contribute to community discussions, and share your own discoveries. The more you engage, the more you will master the figma to webflow workflow. As the no-code landscape expands, your expertise will set you apart and open doors to next-generation design-to-development opportunities.
Share article


$249
$3601
All Access
Save with our all access bundle - get access to all premium Framer templates.
38
+
Framer Templates
51
+